Cursos para crear una hermosa muñeca artesanal de trapo
- Técnicas básicas para coser y bordar en trapo
- Cómo elegir el material adecuado para tu muñeca
- Diseños y patrones para crear una muñeca artesanal
- Consejos para dar vida a tus personajes de trapo
- Cómo crear la cabeza, cuerpo y extremidades de tu muñeca
- Decoración y detalles para personalizar tu creación
- Técnicas avanzadas para crear expresiones faciales y gestos
- Cómo montar y unir las piezas de tu muñeca
- Preguntas frecuentes
Técnicas básicas para coser y bordar en trapo
Manejo del Trapo
El manejo del tramo es fundamental para comenzar a coser y bordar. Primero, es importante enrollar el tramo en un bobbin o en una bola compacta para evitar que se desplome durante el proceso de costura.
Técnicas de Cosido
La técnica de cosido más común en trapo es el punto de cruz (Running Stitch). Consiste en pasar la aguja por debajo y por arriba del tramo, creando un sencillo filo continuo. También se pueden utilizar técnicas como el punto de punta (Whipstitch) para sellar bordes o el punto de relleno (Filling Stitches) para llenar áreas con colores.
Técnicas de Bordado
Para crear detalles y ornamentaciones en la muñeca, es necesario dominar técnicas básicas de bordado. La técnica del hilo simple (Satin Stitch) es ideal para cubrir grandes superficies con colores suaves y continuos. Otra técnica popular es el punto de florón (French Knot), que se utiliza para crear pequeños detalles y flores en la muñeca.
Preparación del Trapo
Antes de comenzar a coser y bordar, es importante preparar el tramo. Se recomienda limpiar y estirar el tramo para eliminar cualquier arruga o imperfección. También se puede utilizar una aguja especial para trapos para evitar que la fibra se desgarre durante el proceso de costura.
Recursos Adicionales
Para profundizar en las técnicas básicas de coser y bordar en trapo, recomendamos consultar recursos adicionales como libros o tutoriales en línea. Además, es importante practicar y experimentar con diferentes técnicas para desarrollar habilidades y estilo personalizado en la creación de muñecas artesanales de tramo.
Cómo elegir el material adecuado para tu muñeca
Consideraciones Generales
Cuando se trata de elegir el material adecuado para crear una muñeca artesanal de tramo, es importante considerar varios factores. El tipo de trapo que deseas utilizar, la función y apariencia que deseo darle a tu muñeca, y el presupuesto son algunos de los aspectos clave que debes tener en cuenta.
Tipos de Trapo
Existen diferentes tipos de tramo, cada uno con sus propias características y ventajas. El tramo de algodón es una excelente opción para principiantes, ya que es fácil de manejar y se puede teñir con facilidad. Otros materiales como el lino, la seda o la basta también son populares entre los artesanos de muñecas. Considera qué tipo de tramo mejor se adapta a tus necesidades y habilidades.
Factores de Calidad
La calidad del material es fundamental para crear una muñeca que dure y tenga una apariencia atractiva. Busca tramos con una textura suave y uniforme, sin defectos ni telas cortadas. También es importante considerar la densidad del trapo, ya que un tramo demasiado denso puede ser difícil de coser o bordar.
Color y Textura
El color y la textura del tramo pueden influir significativamente en el aspecto final de tu muñeca. Si deseas crear una muñeca con un aspecto vintage, considera utilizar trapos con colores suaves y texturas suaves. Para crear un look más moderno, puedes elegir trapos con colores vibrantes y texturas más rígidas.
Recursos Adicionales
Para obtener más información sobre los materiales adecuados para tu muñeca, recomendamos explorar recursos adicionales como libros de artesanía o tutoriales en línea. También es importante experimentar con diferentes materiales y técnicas para encontrar el estilo que mejor se adapta a tus habilidades y preferencias personales.
Diseños y patrones para crear una muñeca artesanal
Inspiration from the World of Fashion
When it comes to designing a handmade doll, inspiration can come from anywhere. From classic fairy tale characters to modern fashion icons, there are countless styles and themes to explore. Consider looking at fashion magazines, runways, or even your own wardrobe for ideas on fabrics, colors, and shapes.
Traditional Patterns vs. Modern Twists
When it comes to patterns, traditional designs like florals, stripes, or polka dots can add a touch of whimsy and charm to your doll. However, don't be afraid to experiment with modern twists and unique designs. Geometric patterns, abstract art, or even photographs can create a truly one-of-a-kind piece.
Creating Your Own Pattern
One of the most exciting aspects of creating a handmade doll is designing your own pattern. You can use your favorite fabrics, colors, and textures to create a custom design that reflects your personal style. Consider using a combination of different materials, like felt, lace, or embroidery floss, to add depth and interest to your design.
Tips for Working with Patterns
When working with patterns, it's essential to keep in mind the scale and proportions of your doll. A pattern that looks great on a large piece of fabric may not translate well to a smaller scale. Take the time to adjust your pattern accordingly, and don't be afraid to experiment and make changes as you go along.
Resources for Inspiration
For even more inspiration and guidance, consider checking out books, tutorials, or online courses specifically designed for creating handmade dolls. You can also join online communities or forums where artists share their own designs and patterns, offering valuable insights and ideas to get your creative juices flowing.
Consejos para dar vida a tus personajes de trapo
Adding Personality with Accessories
When creating your handmade doll, accessories can make all the difference in bringing your character to life. Consider adding features like hair, eyes, or even clothing that reflects their personality. For example, a brave warrior might wear a bold, red cloak, while a gentle fairy might have delicate wings and a sparkly crown.
Emphasizing Expressions
The expression on your doll's face can also greatly impact its overall character. Consider using embroidery floss, felt, or even beads to create eyes that seem to sparkle with life. You can also add subtle facial expressions using small pieces of fabric or thread. This will help your character exude confidence, curiosity, or even mischief.
Using Texture and Dimension
To give your doll a more lifelike appearance, consider incorporating different textures and dimensions into your design. For example, you could use felt for the hair, lace for the clothing, or even add some subtle shading to create depth and dimension. This will help your character appear more realistic and engaging.
Storytelling Through Details
Finally, don't forget the importance of storytelling through details. Consider adding small, intricate details that reveal a bit about your doll's personality, backstory, or motivations. For example, a brave warrior might have a small tattoo on their arm, while a gentle fairy might carry a tiny, delicate flower.
Tips for Bringing Your Character to Life
When working with your handmade doll, remember to keep the following tips in mind:
• Use a variety of materials and textures to add depth and interest
• Pay attention to proportions and scale when designing accessories
• Experiment with different expressions and facial features
• Don't be afraid to add small, intricate details that tell a story
Cómo crear la cabeza, cuerpo y extremidades de tu muñeca
Building the Foundation: Head and Body
When creating your handmade doll, the head and body are the foundation of your character. To start, you can use a simple ball-shaped piece of fabric or felt for the head, and a cylindrical shape for the body. You can then add details like eyes, nose, and mouth using embroidery floss, beads, or other materials.
Adding Structure with Wire
To give your doll more structure and stability, consider adding wire armatures to the head and body. This will allow you to pose your doll in different ways and create a more lifelike appearance. You can use thin wire or even pipe cleaners to create the armature, depending on the size and complexity of your design.
Creating Realistic Limbs
When it comes to creating the limbs of your doll, consider using a combination of fabric, felt, or even paper mache. You can shape each limb into its desired form and then attach them to the body using a strong adhesive like glue or hot glue. To add more realism, you can also use wire armatures for the arms and legs.
Tips for Building a Realistic Body
When building your doll's body, remember to keep the following tips in mind:
• Use a sturdy fabric or felt for the body and limbs
• Pay attention to proportions and scale when designing each limb
• Experiment with different poses and positions to ensure stability and realism
• Don't be afraid to add small details like joints or hinges to create more movement and flexibility
Decoración y detalles para personalizar tu creación
Adding a Touch of Personality
Once you have the basic structure of your handmade doll in place, it's time to add some personality and character. This is where decoration and details come into play. Consider adding features like hair, eyes, or even clothing that reflects your character's personality or backstory.
Embellishing with Fabric and Felt
Fabric and felt are excellent materials for adding embellishments to your doll. You can use them to create intricate designs, patterns, or even entire outfits. Look for textures and colors that complement each other and add depth to your design. For example, you could use a soft, fluffy fabric for the hair and a smooth, shiny felt for the clothing.
Using Beads and Sequins
Beads and sequins can add a touch of whimsy and magic to your handmade doll. You can use them to create intricate designs or patterns on the clothing, hair, or even the face. Just be careful not to overdo it – too many beads or sequins can make your doll look overwhelming.
Adding Accessories for Storytelling
Accessories are a great way to add storytelling and depth to your handmade doll. Consider adding small items like a wand, book, or even a tiny animal companion that reflects your character's personality or interests. These details can help bring your doll to life and make it more engaging and relatable.
Tips for Adding Decorations
When decorating your handmade doll, remember the following tips:
• Start with a clean slate – avoid over-embellishing your doll too early on
• Experiment with different materials and textures to add depth and interest
• Pay attention to proportions and scale when adding accessories or decorations
• Don't be afraid to try new things and make mistakes – they can often lead to unique and interesting design elements
Técnicas avanzadas para crear expresiones faciales y gestos
Mastering Facial Expressions
Creating realistic facial expressions is a crucial aspect of bringing your handmade doll to life. To achieve this, consider using advanced techniques like layering fabric or felt to create subtle texture and dimensionality on the face. You can also use embroidery floss or yarn to draw on eyebrows, eyelashes, or even entire facial features.
Creating Life-Like Gestures
When it comes to creating gestures, think beyond simple arm movements. Consider using wire armatures to create more complex poses and expressions. For example, you could shape the arms to form a gentle curve, as if your doll is embracing someone or something. Alternatively, you could use fabric or felt to create a soft, flowing motion that captures the essence of movement.
Using Fabric Painting for Realism
Fabric painting can be an excellent way to add subtle shading and dimensionality to your handmade doll'faces. Use gentle, muted colors to create a natural, lifelike appearance. You can also experiment with layering different shades or textures to achieve a more realistic effect.
Tips for Advanced Facial Expressions and Gestures
When creating advanced facial expressions and gestures, remember the following tips:
• Experiment with different materials and techniques to achieve unique effects
• Pay attention to proportion and scale when creating facial features or gestures
• Don' be afraid to add small details like eyelashes or eyebrows to enhance realism
• Practice makes perfect – don't be discouraged if it takes time to master advanced techniques
Cómo montar y unir las piezas de tu muñeca
Assembling the Body
Once you have created all the individual parts of your handmade doll, it's time to bring them together. Start by assembling the body, using a combination of stuffing and sewing to secure the limbs and torso in place. Make sure to leave enough room for movement and flexibility, so your doll can be posed and displayed with ease.
Joining the Head and Body
The head is typically attached to the body using a combination of stuffing and stitching. Start by positioning the head on top of the body, making sure it's centered and even. Then, use a needle and thread to sew the head into place, making sure the stitches are secure and invisible.
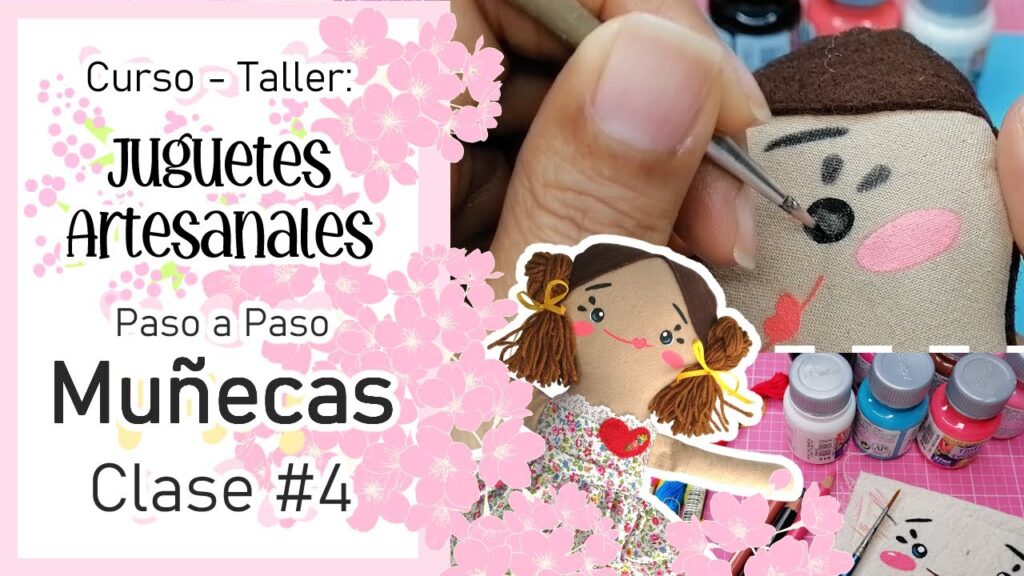
Adding Facial Features and Hair
Once the head is attached, you can begin adding facial features like eyes, eyebrows, and lips. Use a combination of embroidery floss, yarn, or paint to bring your doll's face to life. You can also add hair using fibers, yarn, or even human hair (if you're feeling adventurous!).
Tips for Assembling Your Doll
When assembling your handmade doll, remember the following tips:
• Make sure to stuff and sew each limb separately before attaching them to the body
• Use a combination of stuffing and stitching to secure the head to the body
• Leave enough room for movement and flexibility in the limbs and joints
• Practice makes perfect – don't be discouraged if it takes time to get the hang of assembling your doll
Additional Tips for Advanced Doll-Makers
If you're an experienced doll-maker, consider the following advanced tips:
• Use a wire armature to create more realistic poses and movements
• Experiment with different materials and textures to add depth and interest to your doll's body and face
• Consider adding small details like eyelashes or eyebrows to enhance realism
Preguntas frecuentes
Q: What materials do I need to get started with making a handmade doll?
A: To make a handmade doll, you'll need a variety of materials such as fabric, stuffing material (like polyester fiberfill), thread, yarn, embroidery floss, and any additional embellishments like buttons or ribbons. You can find these materials at craft stores or online.
Q: How do I choose the right fabric for my doll?
A: When choosing fabric for your handmade doll, consider the color, texture, and durability of the material. Cotton or muslin are popular choices because they are soft, breathable, and easy to work with. You can also experiment with different textures like lace, velvet, or felt to add interest and dimension.
Q: How do I create realistic facial expressions on my doll?
A: To create realistic facial expressions on your handmade doll, consider using advanced techniques like layering fabric or felt to create subtle texture and dimensionality. You can also use embroidery floss or yarn to draw on eyebrows, eyelashes, or even entire facial features.
Q: Can I add hair to my handmade doll?
A: Yes, you can add hair to your handmade doll using fibers, yarn, or even human hair (if you're feeling adventurous!). Simply sew the hair into place using a needle and thread, making sure to secure it firmly so it doesn't come loose over time.
Q: How do I display my finished handmade doll?
A: Once your doll is complete, you can display it on a shelf or in a cabinet, or even create a custom display stand using cardboard, wood, or other materials. You can also use a wire armature to create a poseable display that showcases your doll's features.
Q: Can I sell my handmade dolls?
A: Yes, many handmade doll-makers sell their creations online through platforms like Etsy or at local craft fairs and markets. Just make sure to research any relevant laws and regulations regarding the sale of handmade items in your area.